Setup guide
TableNest setup guide: from signup to your first booking
Everything the setup wizard asks for, in the order it asks — and what changes when you switch your booking page on for guests.
Printed from https://tablenest.app/setup-guide
Setting up TableNest takes five things: create an account, complete a six-step venue wizard, take a booking from the dashboard, put your booking link or widget on your website, and add a card to switch the booking page on for guests. The wizard’s six steps are Venue (name, booking URL, address, country, timezone, brand colour), Areas (the named sections of your floor), Tables (each bookable table and its seat count), Hours (opening times per day), Rules (booking duration, buffer, slot interval, booking window, party-size limits), and an optional “how did you hear about us” question you can skip. There is no services step: services, events and deposits are set up later from the dashboard and none of them are needed to take a booking. Signup asks for no card; a card is needed to open your booking page to the public and to keep going after the 30-day free trial.
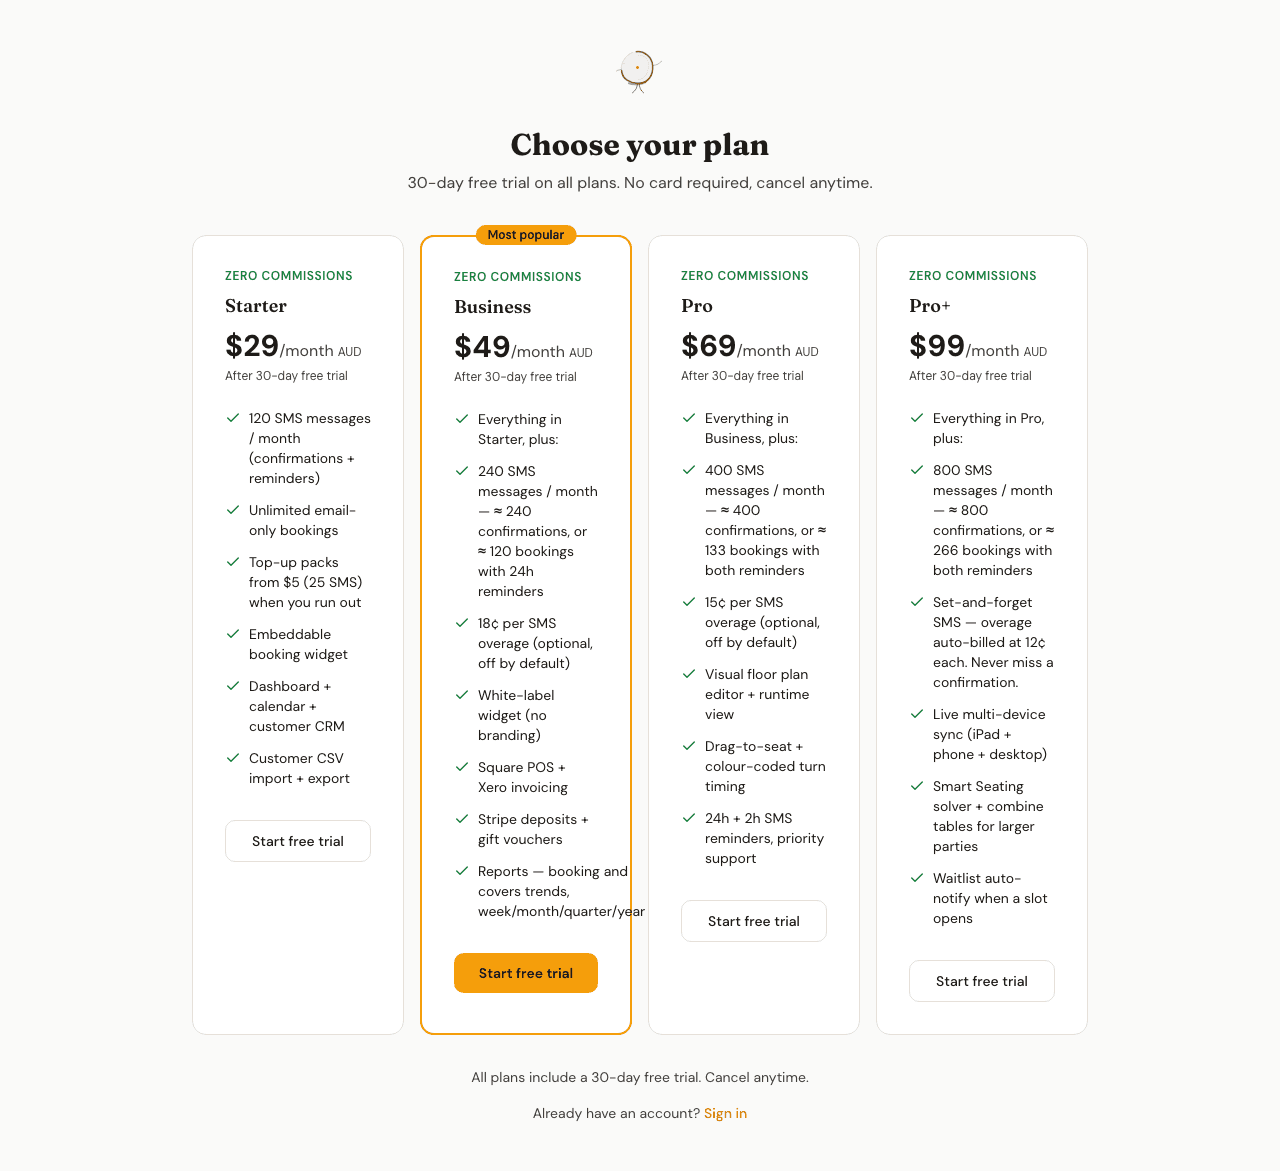
Step 1. How do you create a TableNest account?
Pick a plan, enter your name, email and a password, then click the confirmation link TableNest emails you.
Signup is two screens. The first is the plan picker — every plan starts on a 30-day free trial with full access to that plan’s features, and no card is asked for. The second takes your name, email and a password.
TableNest then emails a confirmation link. Clicking it signs you in and drops you straight into venue setup. If you close the tab before you start the wizard, signing in again brings you back to it. Once you save the first step your venue exists, and signing in takes you to your bookings instead — everything after that is edited in Venue Settings rather than the wizard.
Step 2. What does the TableNest setup wizard ask for?
Six steps in this order: Venue, Areas, Tables, Hours, Rules, and an optional "how did you hear about us" question.
The wizard saves as you go — each “Save & continue” writes that step before moving on, so a lost connection costs you one step, not the lot. There is no separate services or menu step: services, events and deposits are configured later from the dashboard, and none of them are needed to take a booking.
| Step | What the step is for | Required? |
|---|---|---|
| 1. Venue | Name, booking URL, address, country, timezone, brand colour | Yes |
| 2. Areas | The named sections of your floor | Yes |
| 3. Tables | Every bookable table, under its area, with a seat count | Yes |
| 4. Hours | Opening times, day by day | Yes |
| 5. Rules | Duration, buffer, slot interval, booking window, party sizes | Yes |
| 6. You found us | One question about how you found TableNest | Optional |
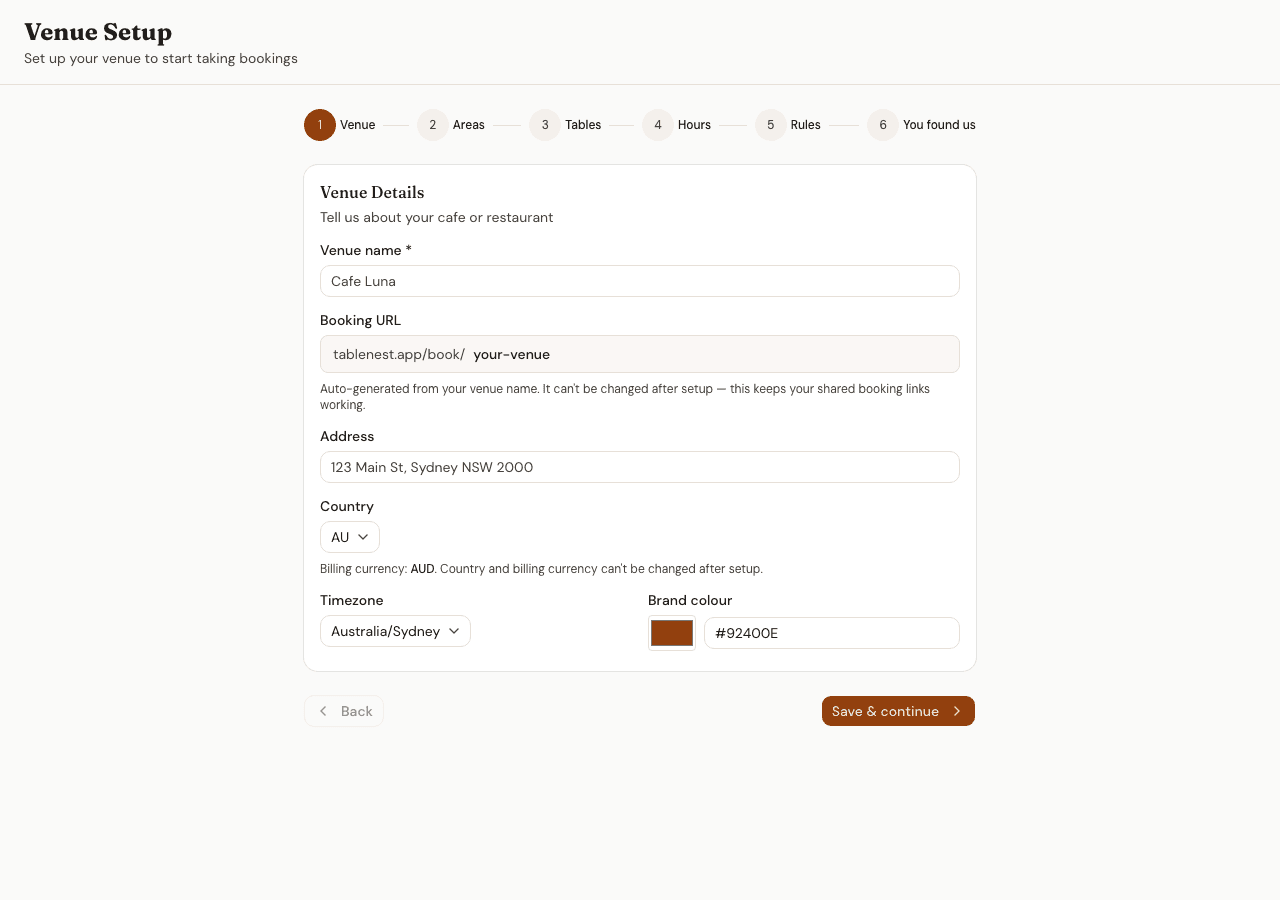
1. Venue — What does the Venue step ask for?
Your venue name, booking URL, address, country, timezone and brand colour.
- Booking URL is generated from your venue name and is permanent — it can't be changed after setup, so links you've already shared keep working.
- Country sets your billing currency, and neither can be changed after setup. The currency is shown under the picker before you continue.
- Timezone defaults from the country you pick and decides what "today" means on every screen.
- Brand colour is the accent your guests see on the booking page.
2. Areas — What is a seating area, and how many do I need?
An area is a named section of your floor — Indoor, Patio, Bar — and you need at least one.
- The step arrives pre-filled with Indoor and Patio. Rename them, delete one, or add your own.
- Areas are what a guest picks from as an "area preference" on the booking widget.
- You can't continue with zero areas, because the next step hangs tables off them.
3. Tables — How many tables do I have to add?
At least one, and realistically every table you'd seat a booking at, each with its seat count.
- Tables are added under the area they sit in, with a name and a number of seats.
- A venue with zero tables reads as fully booked on every date, so the wizard won't let you past this step empty.
- Seat counts are what availability is calculated against — a four-seat table isn't offered to a party of six.
4. Hours — How do opening hours affect what guests can book?
Booking slots are only generated inside your opening hours, so a day marked closed offers nothing.
- Each day has an open/closed toggle and an open and close time. Sunday starts closed by default.
- If you started from a cafe, wine bar, brewery or salon link, this step arrives pre-filled from that template — change anything that doesn't match your venue.
- You can change hours later from Availability → Opening Hours in the dashboard.
5. Rules — What booking rules does TableNest ask me to set?
Default booking duration, buffer between bookings, time-slot interval, how far ahead guests can book, and minimum and maximum party size.
- Duration plus buffer is how long a table is held — that's what stops the next guest being offered a seat that's still occupied.
- Time-slot interval is the spacing of the times a guest sees (every 15, 30 minutes, and so on).
- The advance booking window caps how far into the future the widget will take a booking.
- Min and max party size bound what the widget offers; larger parties come through the phone or your waitlist instead.
6. You found us — Do I have to answer "how did you hear about us"?
No — this last step has a Skip button and skipping it finishes setup exactly the same way.
- One question, preset options plus a free-text box.
- Skip sends nothing at all, even if you'd already picked an option.
- Either way, the next thing you see is your dashboard.
Step 3. How do you take your first booking?
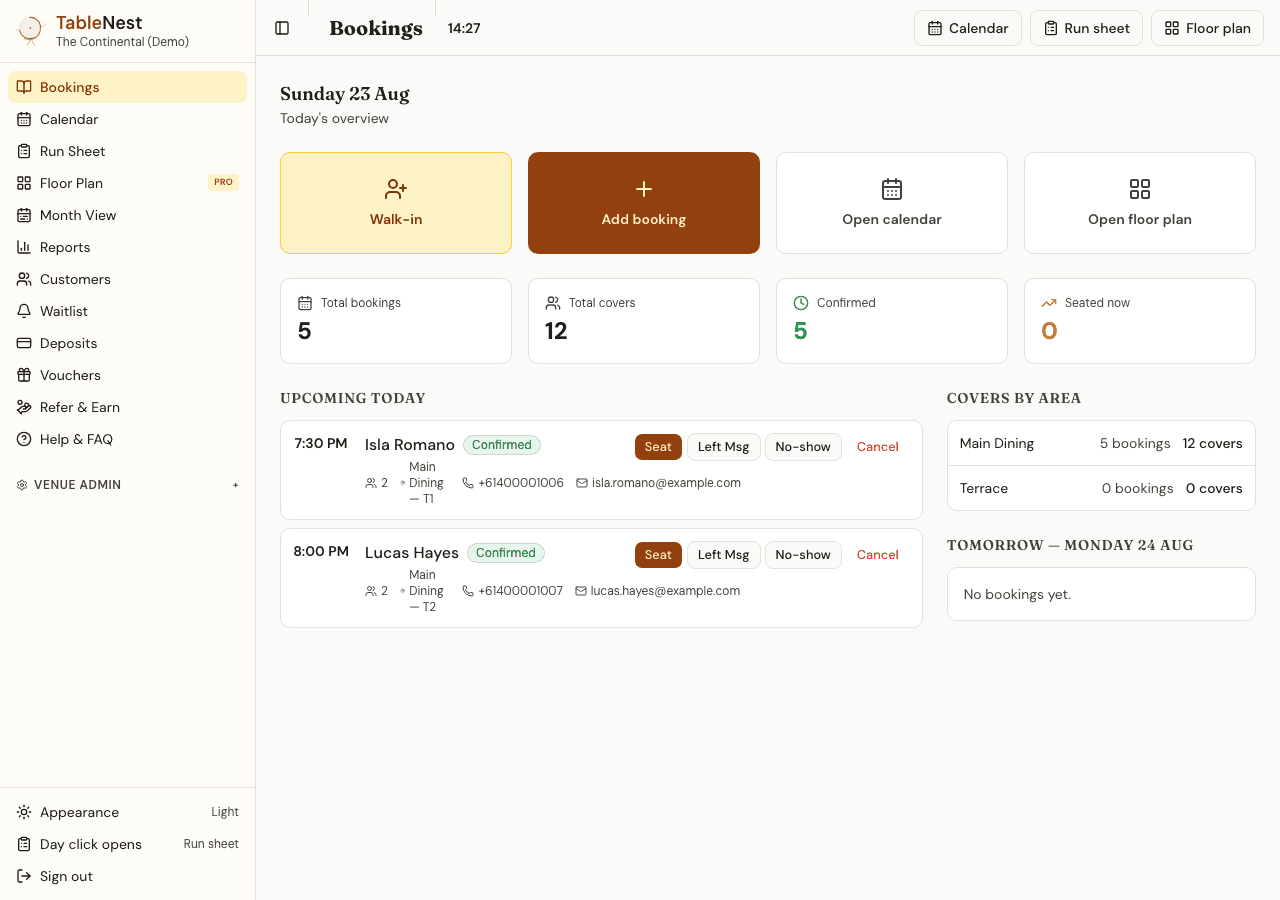
Use Add booking on the dashboard — you can enter bookings by hand before your booking page is open to the public.
Finishing the wizard lands you on the bookings dashboard, which shows today and tomorrow. The quick actions across the top include Add booking: date, time, party size, area or table, and the guest’s details.
This works straight away, before you’ve added a card. Bookings entered by a signed-in member of the venue aren’t subject to the public booking gate, so you can put the phone bookings you already have into TableNest and see them on the calendar and run sheet while you’re still deciding.
What those bookings don’t do yet is message the guest. Confirmations and reminders to diners are part of going live, two sections down.
Step 4. How do you put TableNest on your website?
Go to Integrations → Embed Widget in the dashboard and copy one of three things: a direct link, an iframe embed, or a one-line script tag.
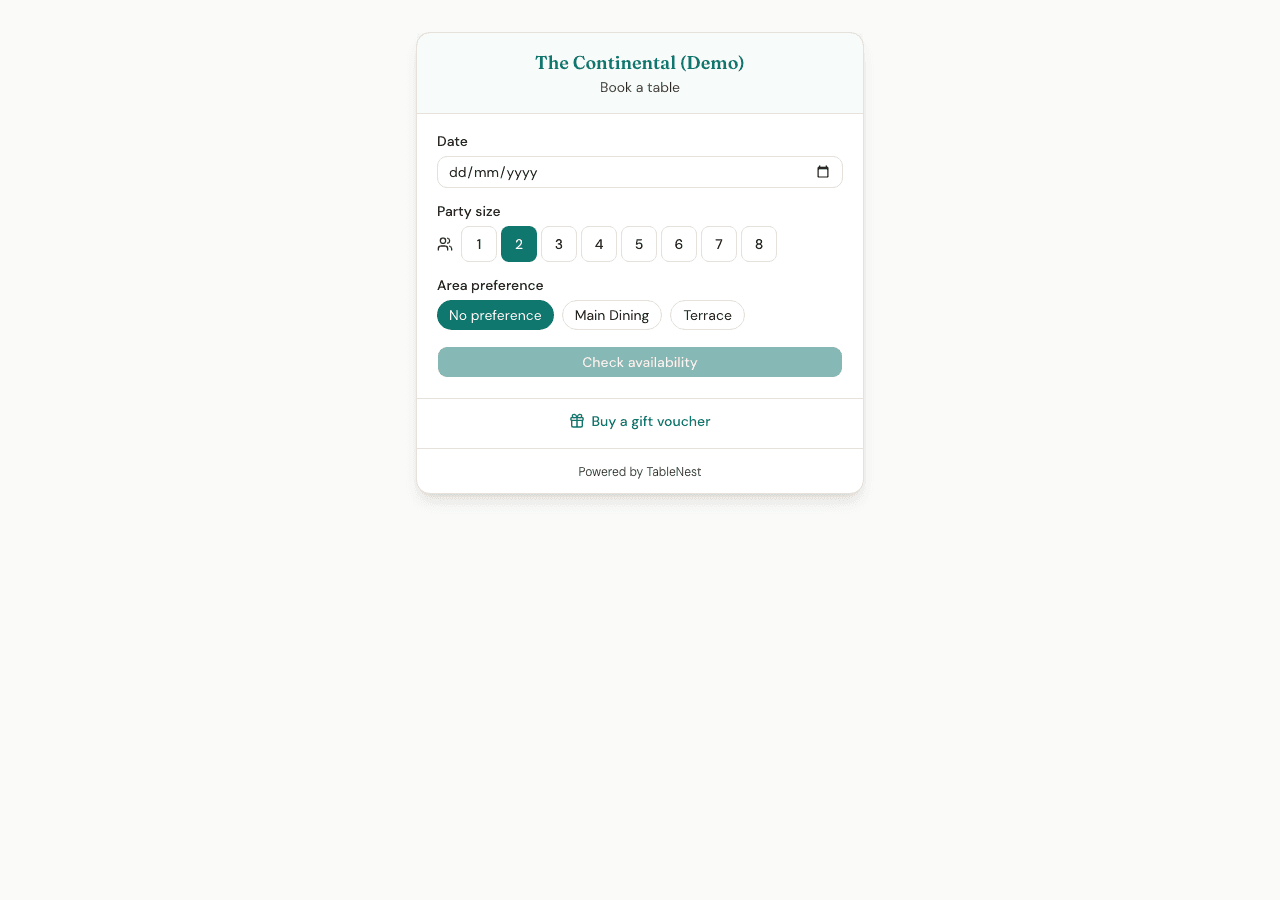
Every venue gets a hosted booking page at tablenest.app/book/your-venue from the moment setup finishes. If you don’t have a website, that page isyour booking page — put the link in your Instagram bio, your Google Business profile, your email signature. It starts accepting bookings once a card is on file; before that it tells visitors the venue isn’t taking online bookings yet — that is the next step, Go live.
If you do have a website, the Embed Widget screen gives you three options:
- Direct link— your booking page URL. Point a “Book a table” button at it. Works everywhere, nothing to install.
- iframe embed— paste the snippet and the booking form renders inline. You set its height yourself and it stays where you set it, so pick a number that fits your tallest step. Reach for this when the script embed below isn’t an option on your website.
- Script embed — the one we recommend. One line, and it resizes itself as guests move through the form, so there is no blank space to trim and nothing to scroll inside:
<script src="https://tablenest.app/widget/v1/widget.js" data-venue="your-venue" async></script>Both embeds render the same booking form your hosted page does. You can see a live one on the demo venue: tablenest.app/book/demo-business.
Step 5. How do you switch your booking page on for guests?
Add a card under Payments & Billing → Billing & Usage. Until a card is on file your booking page stays closed to the public and no messages go to guests.
Signup asks for no card, and everything above works without one — the wizard, the dashboard, manual bookings, the calendar. Going live is a separate, deliberate switch, and it is the one that turns on the parts of TableNest the outside world can see:
- your public booking page and the embedded widget start accepting bookings (before that, they tell visitors the venue isn’t taking online bookings yet);
- SMS and email confirmations and reminders to guests start sending;
- deposits and gift-card payments become available on the plans that include them.
Until then the dashboard carries a persistent strip saying the booking page isn’t open yet, with a link to the billing page. It disappears the moment a card is on file. Your free trial runs for 30 days from the start; the billing page states exactly when the first charge falls.
One thing worth doing before you flip it: open your own booking page as a guest would, pick a date, and check the times offered match the hours and rules you set. It’s the fastest way to catch a table you forgot to add or a close time that’s an hour out.
Setup questions, answered
How long does TableNest setup take?
The setup wizard is six steps and most venues finish it in one sitting. The slowest part is entering tables, because that's the only part nobody can guess for you — everything else has a sensible default you can change later. Areas, hours, booking rules and your brand colour are all editable from the dashboard afterwards.
Do I need a credit card to set up TableNest?
No card is required at signup. You can create an account, complete the venue wizard, add bookings by hand and use the dashboard without entering payment details. A card is needed to switch your public booking page on for guests, to send confirmations and reminders to diners, and to keep using the dashboard once the 30-day free trial ends.
Is there a services step in the TableNest setup wizard?
No. The wizard has six steps — Venue, Areas, Tables, Hours, Rules, and an optional "how did you hear about us" question. Service types, events and deposit policies are configured later from the dashboard, and none of them are needed to take a booking.
Can I change my booking URL after setup?
No. The booking URL is generated from your venue name during the first step of the wizard and is permanent, so any link you've already shared keeps working. Your venue's display name can still be changed; only the URL slug is fixed.
What happens if I don't add any tables?
The wizard won't let you past the Tables step with none. A venue with zero tables reads as fully booked on every date, so the booking widget would show no availability at all. Add at least one table per area you plan to seat bookings in, each with its seat count.
Can I take bookings before I go live?
Yes, from the dashboard. Bookings entered by a signed-in member of the venue aren't subject to the public booking gate, so you can enter phone bookings and see them on the calendar and run sheet before adding a card. What doesn't happen yet is the guest-facing part: confirmations and reminders to diners only send once the venue is live.
Do I need a website to use TableNest?
No. Every venue gets a hosted booking page at tablenest.app/book/your-venue, and that link works on its own — in an Instagram bio, a Google Business profile or an email signature. It starts accepting bookings once a card is on file; before that it tells visitors the venue isn't taking online bookings yet. The embeddable widget is for venues that do have a site and want the booking form on their own page.
Can I start a TableNest trial in Australia?
Yes. TableNest is open for new venues in Australia, billed in AUD. The country you pick in the first step of the setup wizard sets your billing currency permanently, so pick the one your venue actually operates in.
Prefer a PDF? Print this page from your browser (File → Print → Save as PDF) — it’s formatted for it.
Ready to set your venue up?
30-day free trial. No card required at signup. Cancel anytime.
Start free trial